Learn How to Use Paypal to Accept Payments on Your Website, Set up Subscription Payments, Integrate with 3rd Party Cloud-Based Software, Autoresponders and much more …
If you want to start an online business, you need to be able to accept card payments on your website. The process of getting a merchant account can be a time-consuming difficult process not to mention EXPENSIVE!
Paypal offers you a trusted and easy-to-use solution.
Let’s face it, almost everyone knows what Paypal is. You’ve probably used it to buy things online yourself!
Use PayPal to Set Up a Shopping Cart on Your Website
 Having a shopping cart on your site is extremely important. You need to make sure that the customers can buy when they’re ready. You don’t want them to have to go through unnecessary processes that will make buying too tricky. People want to buy and pay for the item when they see it. If you make them jump through too many hoops, they’ll buy from another site. You’d do the same thing, and that’s the truth.
Use PayPal to Sell Digital Products Quickly And Easily
![]() Everyone knows that digital products are big moneymakers. You need to act when the iron is hot. Instant downloads are so important if a customer has an interest in what you have to sell them. No one wants to wait hours or even days for a download link to be sent to them. They want to download the digital product within moments after paying. Using Paypal will make it happen, and it’ll all be effortless. The customer will have their product, and you’ll get paid for it too.
Everyone knows that digital products are big moneymakers. You need to act when the iron is hot. Instant downloads are so important if a customer has an interest in what you have to sell them. No one wants to wait hours or even days for a download link to be sent to them. They want to download the digital product within moments after paying. Using Paypal will make it happen, and it’ll all be effortless. The customer will have their product, and you’ll get paid for it too.
Use PayPal to Configure Different Payment Options
 As a vendor, PayPal offers you a variety of ways to get paid from your customers. You can choose a PayPal button to suit your needs.
BUY NOW button – makes it easy to purchase one or more of a single item. With this Paypal button, you also get inventory tracking and item description options.
ADD TO CART button – allows you to sell multiple items with one payment button.
DONATE button – allows you to accept donations and contributions on your website.
SUBSCRIBE button – lets you set up recurring charges of the same amount for your products or services.
INSTALMENT PLAN button – gives the customers the option to pay in instalments for up to one year.
AUTOMATIC BILLING – allows you to charge customers for goods or services that change in price monthly.
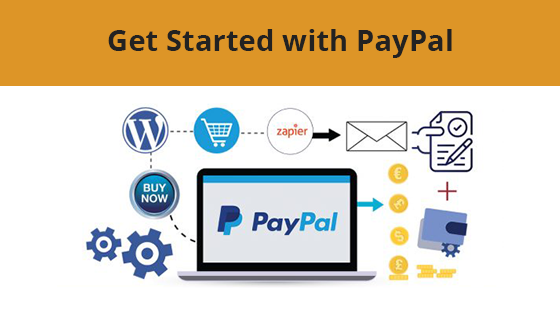
You can even integrate PayPal with your Webinar Provider, Zapier or your Autoresponder!
This means with every PayPal sale you can add a new member ‘automatically’ to your autoresponder list.
Paypal Is A Name Everyone Trusts
![]() Everyone at some point has given their credit card information to a payment processor that seemed sketchy at best while hoping nothing happens to their card.! Customers trust PayPal, and they’re familiar with their services. Your customers will trust the PayPal logo and know they’re protected. PayPal is accepted worldwide and everyone who shops online knows who they are.
Everyone at some point has given their credit card information to a payment processor that seemed sketchy at best while hoping nothing happens to their card.! Customers trust PayPal, and they’re familiar with their services. Your customers will trust the PayPal logo and know they’re protected. PayPal is accepted worldwide and everyone who shops online knows who they are.
BUT… there’s a lot to learn when it comes to accepting credit cards on your site using PayPal.
Many people that try to figure things out on their own and waste a lot of time, get frustrated and make time-consuming mistakes.
No one is going to say that you’re going to learn it all in a mere matter of minutes. However, this course is designed as over-the-shoulder video tutorials to explain everything in a very easy to follow format. You watch as we do it… and you replicate it. It’s THAT simple.
√ You’ll have your very own e-commerce site up and running accepting PayPal.
√ Customers will be able to pay you using their credit card.
√ You’ll receive their payments quickly and efficiently.
√ Set up recurring payments for ongoing products or services.
√ PayPal makes running a business online easy.
The course is divided into 2 sections:
1. PayPal Basics – which consists of 20 tutorials
2. PayPal Advanced – which has another 20 tutorials dealing with the advanced settings in your account and how to use them properly.
Course Modules:
PART 1 – PayPal Basics
1. Welcome & Course Overview
2 – Account Fees and Account Types
3 – Terms of Service
4 – Account Opening
5 – Profile Account Settings – Part 1
6 – Profile Account Settings – Part 2
7 – Profile Account Settings – Part 3
8 – Profile Account Settings – Part 4 – Funding Account Set Up
9 – Profile Account Settings – Part 5 – Setting Up Payment Preferences
10 – Adding Funds To Your Paypal Account
11 – Requesting Funds Through PayPal
12 – Transferring Funds Through PayPal
13 – Sending Funds With PayPal
14 – Mobile App Set-Up
15 – Making Payments With PayPal
16 – Business Set Up – Sending Invoices
17 – Business Set Up – Selling on a Marketplace
18 – Business Set Up – Selling On Your Website
19 – Getting Help From PayPal
20 – Conclusion – Part 1 Summary
PART 2 – PayPal Advanced Settings
1 – Overview – Advanced Functions
2 – Set Up Paypal ‘HERE’
3 – Set Up PayPal Button – Part 1
4 – Set Up Paypal Button – Part 2
5 – Set Up PayPal Button – Part 3
6 – Setting Up Funnels With PayPal
7 – PayPal and Autoresponder Integration
8 – PayPal and Other Autoresponders
9 – Direct Connection to Webinars – Zoom
10 – Direct Connection to WordPress
11 – Direct Connection to Membership Platforms – Part 1
12 – Direct Connection to Membership Platform – Amember
13 – Integration with Zapier
14 – Integration To Autoresponder Through Zapier
15 – Integration To GoToWebinar Through Zapier
16 – Live Example – Create A Subscription Product
17 – Live Example – Integrate your Subscription Product with WordPress
18 – Live Example – Integrate with Autoresponder
19 – Live Example – Integrate with Webinars
20 – Conclusion

